Creating a summary
The following describes how you can create an element. To see which functions are available when creating an element, see the section on Functions.
Procedure
- Activate the App Designer in the Administration app
- In the app of your choice, open a data record in read- or edit mode.
- Tip
You can also insert this element into a dashboard.
- Click Customize in the toolbar of the App Designer.
- When you are at the location at which you wish to insert a new element, click the respective button to insert the new element, for example, Extend z-layout.
- Select Summary.
- The element is inserted. If necessary, you can move the element to another position.

Functions
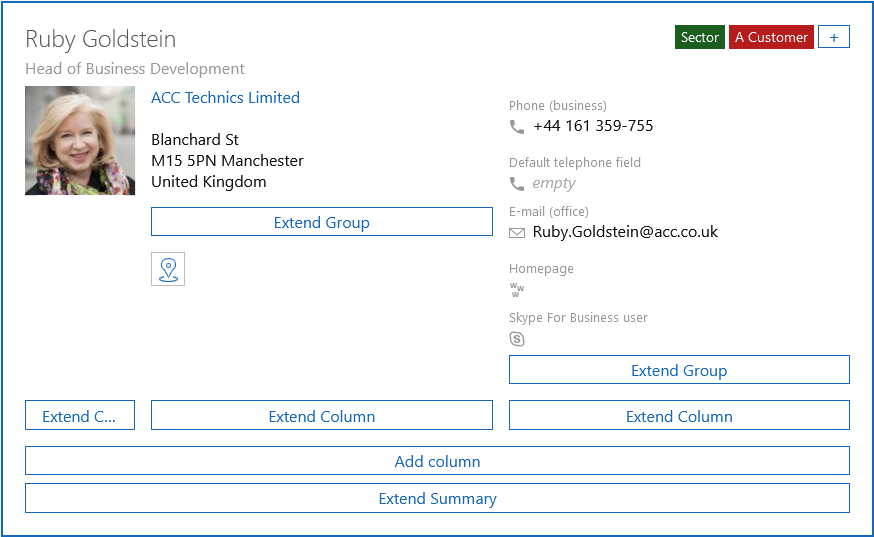
Please note, the Contacts app already has the summary inserted in a preconfigured form.. The fundamental settings are, however, the same for contacts and other data record types.
You can find more information and an example of the configuration of a summary for contacts on the following page: Summaries for contacts.
A summary is inserted with different elements which can also be extended.

Configure title
As a title you can select a field which is then displayed as the title. The title is always formatted automatically as a title and displayed at the top.
If you move the title to another position, then the field which you selected as the title will no longer be formatted as such. Additionally, the Configure title button is displayed again.
Available fields
- Image
Only available if the Picture per data record option has been activated for the data record.
- Database field
- Linked database field
- Link field
Configure subtitle
The subtitle is always displayed below the title.
If you move the subtitle to another position, then the field which you have selected as the title will no longer be formatted as a subtitle. Additionally, the Configure subtitle button is displayed again.
Available fields
- Image
Only available if the Picture per data record option has been activated for the data record.
- Database field
- Linked database field
- Link field
Inserting badge
Using the button on the right hand edge of the Summary element, you can insert badges. Badges can be used to add a label to the summary. For example, in contacts you can display a contact's function. Badges can fetch their content either from database fields, or you can enter the content as a static text.

Badges are always displayed to the right of the headline. You can change the order of the badges, but not move the badges into another element.
Available fields
By clicking Extend summary, you can insert additional elements and fields into your summary.
Available fields
- Actions
Only available for contacts
- Image
Only available if the Picture per data record option has been activated for the data record.
- Extension point
- Graphical input help
- Group
- Horizontal layout
- Business metric
- Vertical layout
- Web frame
- Z-layout
- Database field