Horizontal layout: Example
This guide is an example of how you can adapt the appearance in the App Designer to suit your requirements using nesting for different elements.
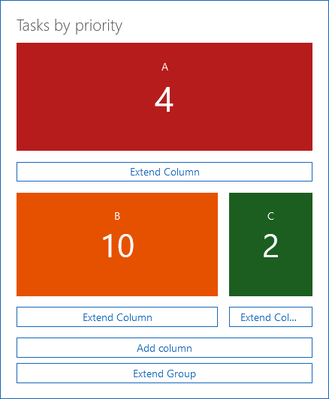
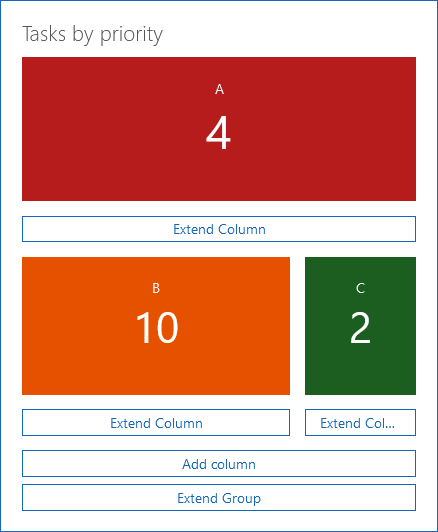
In the example, you will see how many tasks are linked with a contact. The tasks are listed by priority. For this, we have inserted a Group element into a contact data record, into which we can display the business metrics clearly using the horizontal layout.
Do the following to recreate this display:
Inserting element groups and a horizontal layout
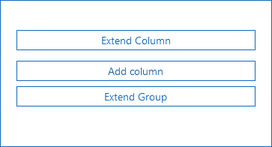
- At the required point, insert the Group element.
- Click Extend group and select Horizontal layout.
- The horizontal layout is inserted.
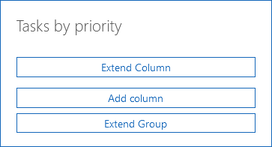
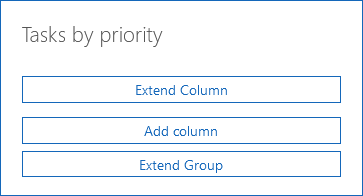
- Click the white area below the Extend group button to open the settings for the group.
- In the Header field enter the title you wish to use, for instance, Tasks by priority
- Click Close to save your settings.
Adding the first business metric
- Click Extend column and select Business metric.
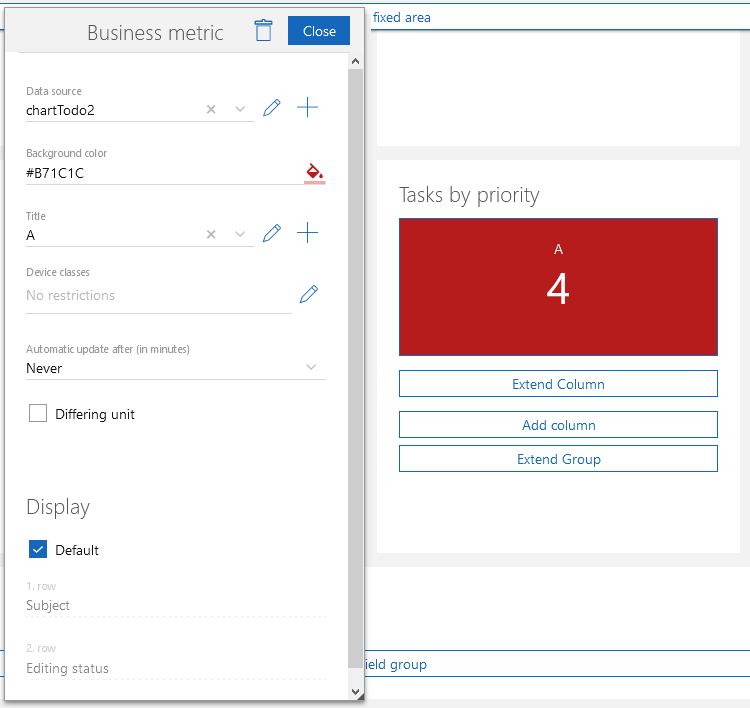
- Define the desired settings for the business metric. In the example, you will see all the linked tasks which are priority A displayed in the first business metric field. The following settings were used to do this:
Field
Setting
Data source type
Aggregation
Heading
A
Data record type
Tasks
Aggregation function
Number of data records
Data source
Linked data records
Automatic update (in minutes)
Never
Background color
#B71C1C
Using these settings, all the linked tasks will be displayed, independent of their priority.
- Now, you need to change the settings for the correct filtering of the priorities. Click the newly inserted business metric to open the settings.

- Click Edit behind the data source.
- The Aggregation window will open.
- Click Adjust filter.
- The Default mode window will open.
- Enter the Priority is equal to A filter condition and click Apply.
- Finally, click Apply in the Aggregation window.
- Consequently, the business metric will be changed and you will only see how many tasks with priority A are remaining. You can now close the Business metric window.

Inserting a second business metric
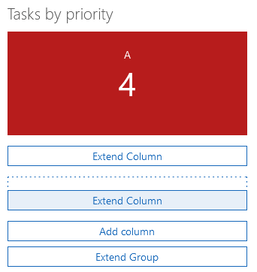
- Click Add column.
- Click the newly inserted Extend column button and then select Business metric.
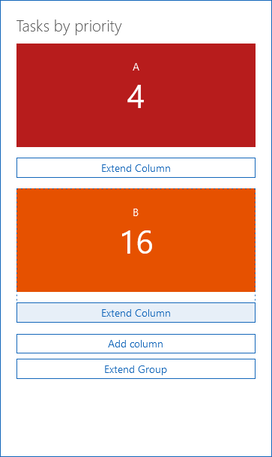
- The settings will be almost the same as those you used when inserting the first business metric value, apart from the fact that you are adding a different header and color.
Field
Setting
Data source type
Aggregation
Heading
B
Data record type
Tasks
Aggregation function
Number of data records
Data source
Linked data records
Automatic update (in minutes)
Never
Background color
#E65100
Using these settings, all the linked tasks will be displayed, independent of their priority.
- Now, you need to change the settings for the correct filtering of the priorities. Use the same steps as you did for the first business metric, until you get to the filter condition, when you should enter Priority is equal to B
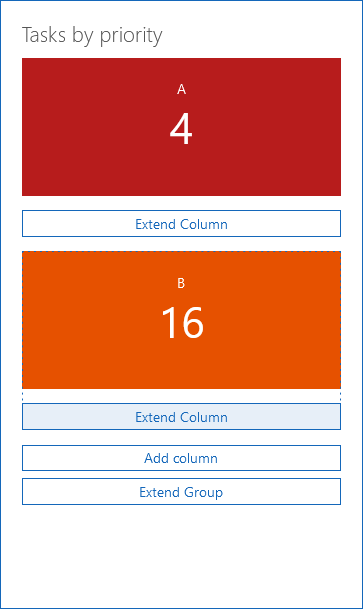
- Now you have inserted 2 business metrics:
Inserting a third business metric
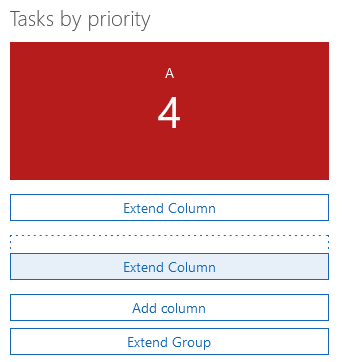
- Click Add column.
- Click the newly inserted Extend column button and then select Business metric.
- The settings will be almost the same as those you used when inserting the first business metric value, apart from the fact that you are adding a different header and color.
Field
Setting
Data source type
Aggregation
Heading
C
Data record type
Tasks
Aggregation function
Number of data records
Data source
Linked data records
Automatic update (in minutes)
Never
Background color
#1B5E20
Using these settings, all the linked tasks will be displayed, independent of their priority.
- Now, you need to change the settings for the correct filtering of the priorities. Use the same steps as you did for the first business metric, until you get to the filter condition, when you should enter Priority is equal to C.
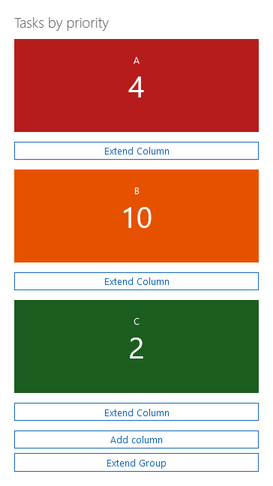
- Now you have inserted 3 business metrics:
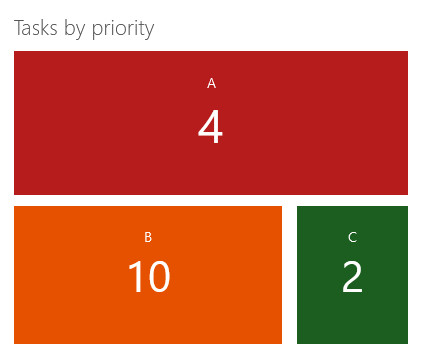
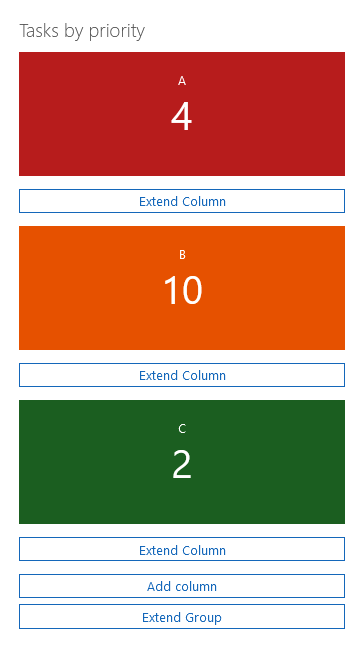
The business metrics are now displayed below one another and require lots of space. In the next step, we will show you how you can create a more compact view, by changing the column size for the B and C priorities.
Changing column size
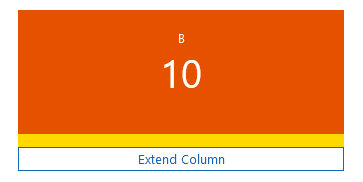
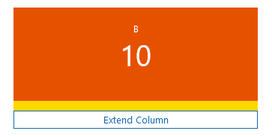
- Click the white area between the second business metric and the Extend column button. The area is marked in yellow in the following image.
- The Column window will open
- Enter the following values:
Field
Setting
Minimal column width
300
Maximal column width
300
Device classes
No restrictions
Hide automatically
Default (activated)
- Click Close to save your settings.
- The settings are saved, but the order of the columns has not yet been changed. To change the order, you will have to change the width of the third columns first.
- Click the white area between the third business metric and the Extend column button.
- Enter the following values:
Field
Setting
Minimal column width
100
Maximal column width
100
Device classes
No restrictions
Hide automatically
Default (activated)
- Click Close.
- The setting is saved. The second and third columns are now displayed in one row.